My youngest daughter. Y’all, let me tell you. She is full of life and color and all things “sparkle”. She’s a little bit like her mama 😉 and can be just a little bit extra at times. But it’s fun. I love life with a little girl like that and enjoy adding as much to that colorful life as possible.
While we were out shopping one day, my little lady and me, she saw this ribbon ponytail holder. She just had to have it and thought it would add a fountain of ribbons to her hair. Isn’t she the cutest? I bought her the ponytail holder and after studying it, told her I can make her one.
Her school’s “Spirit week” was coming up so I thought it the perfect chance. Below, you’ll see the ribbon I chose along with the ponytail holder I bought at the store. I chose to get 4 ribbons with the same width, but if you do this, you can mix up the widths if you’d like.
- Begin by cutting equal lengths of the 4 ribbons. Mine were cut to be about 15 inches in length, each.
- You will need 4 cuts of each ribbon, total, to complete this project.
- These ribbons need to face up if the print is one-sided. After facing them up, I pinched the center of the length, almost layering them on top of each other.
- Next, I laid out the ribbons in this pattern, saving the 4th group to the side.
- The ponytail holder goes down next. Don't worry about exact placement just yet.
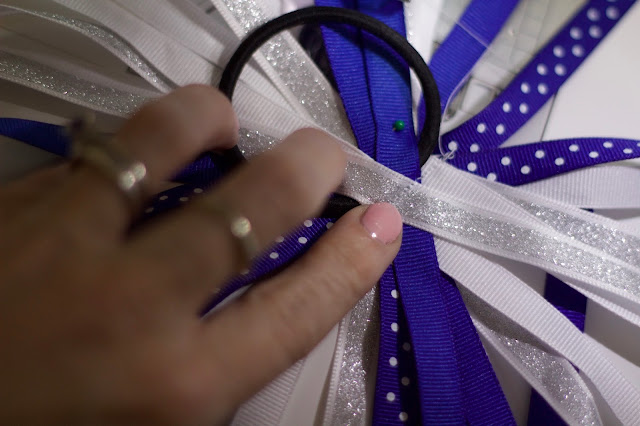
- After getting the ponytail holder down, the 4th set of ribbon cuts goes down horizontally across the center. Now, this next part is tricky so bear with me.
- I had to carefully, carefully, carefully, gather up the ribbons in one hand, pinching down the ponytail holder underneath the fourth layer. Then I pinned the ponytail holder into place by using one straight pin on either side of it.
- Again, very carefully, I set what I had pinched in my fingers down on my sewing machine. I stitched a straight line across the 4th layer on either side of the ponytail holder. It's important to get as close as possible to the ponytail holder in order for it not to move around when you're finished.
And here's the finished product! My girls were absolutely giddy!
Don't you think the ribbons make a fun touch to her ponytail? It's like a little pom-pom.
My girls love this and have another one made out of Valentine's Day themed ribbons. The latest request is for a rainbow one. I love that I can make these customized for my girls and inexpensively at that.
I enjoy keeping an eye out for clearance deals to set aside for future use. These would also make an adorable addition to a kiddos' birthday gift.
What color combinations would you try?
~Amy


0 comments:
Post a Comment
I am so happy you stopped by today. What is on your mind?