User-agent: Mediapartners-Google Disallow: User-agent: * Disallow: /search Allow: / Sitemap: https://www.amy-clary.com/sitemap.xml
Showing posts with label how to. Show all posts

Friday, October 19, 2012


As I began homeschooling this year, it became very apparent to me that bad moods were going to happen and I needed to find an appropriate way to deal with them. My son is a perfectionist and he tends to want to quit right away if he doesn't get something right the first time. AND there are times when I need a break too. {These times generally run parallel to my son's outbursts}

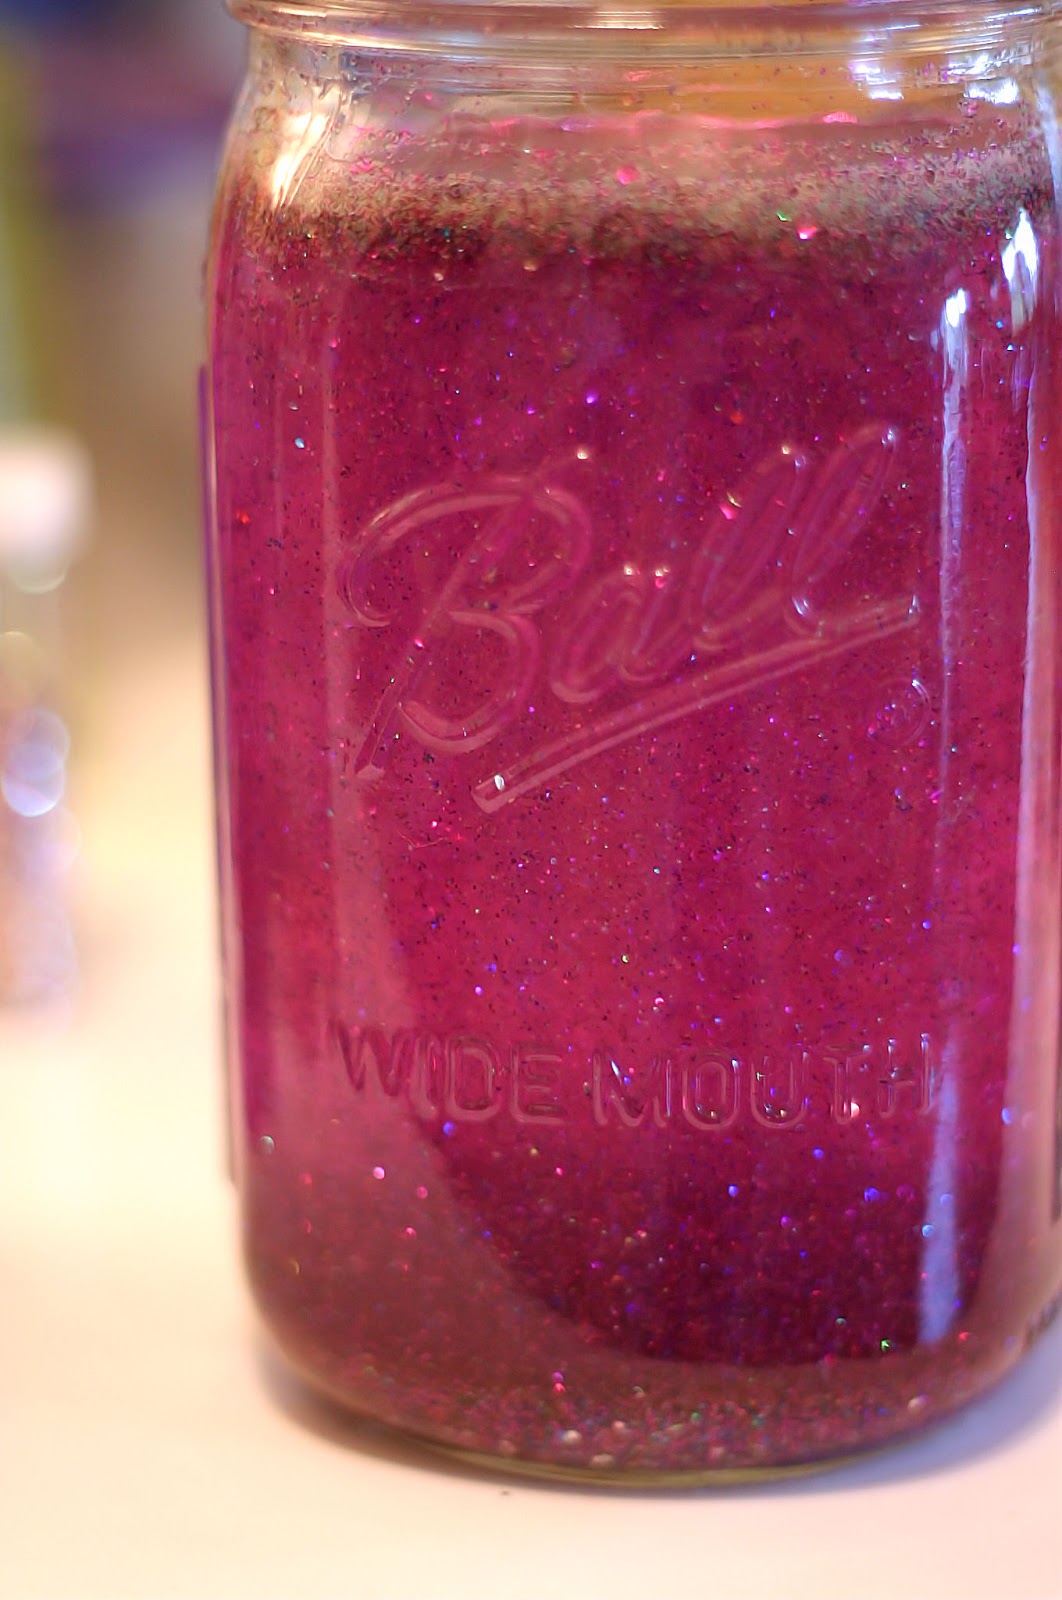
I saw this amazing thing on Pinterest called a "Calm Down Jar" and read that it was to be used as a break; simply shake the jar, watch the glitter fall to the bottom, and relax. I knew I had to make one to try for our school days.

*NOTE: I've seen many different methods of making this but I'll share with you what I used to make mine. 

You'll need:
  • A Mason Jar {washed out}
  • Elmer's Glitter Glue in the color of your choice
  • Loose Glitter
  • And something to stir it all up with. I used wooden skewers. 


I started by filling my mason jar with water and putting it into the microwave to warm up. It was in there for just about 2 minutes, just enough time to get hot. 

Then, I grabbed my loose glitter and shook in all that I wanted. I put a little more in when I thought I had "enough" just to make sure it was nice and glittery. 


Finally, I grabbed my glitter glue and squeezed in about 1/3 of the glue into the jar. You can see my before and after pictures above to get an idea of how much I used. Then I grabbed my skewers to begin stirring it into the water


After it was all mixed up, I ended up using a bit more of the pink, fine glitter I had to make the color a little prettier than the sparkling brown I had going. 


I put the top on the jar {didn't bother to seal it} and shook it up like crazy. The glue, during the stirring process, made me worrisome that the jar wasn't going to turn out. I think it was more the warm temperature of the water than it was the glue. Either way, I was worried. I'm happy to report, however, that the jar works just wonderfully. When we shake it up, we can see the glitter swirl around and then settle.

As for how well it works with my kiddos? It works beautifully!! When my son begins to get upset, I can take down the Calm Jar, shake it up, and place it in front of him while asking him to just take a break for a minute. He and I watch the jar together for a minute and he calms right down, ready to get back to work.

 Sometimes, just taking our minds off the thing that's irritating us that moment, is enough to help regroup and keep going.

PS This also helps during the day when the kiddos lose their cool with each other.


Photobucket

Calm Down Jar DIY

Read More

Saturday, January 28, 2012


When I knew for sure that I was having a girl last year, I knew I wanted to make something fun for over her crib. I found a photo of tissue paper pom-poms and was immediately smitten. Not only do they make adorable and festive decorations for parties/events, I think they're perfect for a mobile too. 

Here's how to make a simple pom-pom. I'll share about putting together a mobile in a separate post. {stay tuned!}

What I Used:
  • White thread 
  • Tissue Paper ~ About 3 full sheets per pom-pom {I chose pink and blue}
  • Scissors
What I Did:
  1. I took 3 sheets of tissue paper in one color and cut it in half lengthwise, stacking the now 6 pieces on top of each other. {Keep in mind here, the more tissue paper you use, the thicker your pom-pom will be. Have some fun with it and figure out what you need to complete the look you're going for.}


  2. Taking one end of the tissue paper stack {on the short side}, I began accordion folding the paper. My                folds were about an inch a piece. {Don't worry about being exact, here. "Close enough" is just right.}


 3. After the tissue paper was folded up, I folded it all in half, matching end to end.


  4. Wire can be used to close this up, but I choose to use thread. Placing the end on the fold I just created, I started wrapping it around. I wrapped it about 10 times, knotted it off, and left the tail of the thread nice and long so I could use it for hanging later.


  5. I cut both ends of the folded tissue paper to round it off. If you prefer, you could cut it in a point as well.


6. I fanned out both sides of the pom-pom as pictured above.


  7. Gently taking one piece of paper at a time, I pulled it up from the stack and in toward the wrapped center. 


  8.  I did this on both sides and then played with the paper a bit to give it a nice, rounded finish. 

Wa-Lah! Tissue paper pom-poms are done! These are so easy and quick to make. 

**Updated to add: **
Find out how to use these pom-poms to make a mobile HERE!


Photobucket

DIY Tissue Paper Pom-Poms {tutorial}

Read More

Saturday, March 5, 2011

When I was at Blissdom, I learned SO many things but this one session sticks out in my mind over anything else. I'm sure I'll gravitate toward other thoughts/lessons as time goes on. This one just happens to be at the forefront of my mind right now.

The session was "Peek Behind The Curtain of PR/Blogger Relations" and I was all "Hello! That's for me!" so I found a seat, grabbed my notebook, and fixed my ears to listen. The main speaker of the session was Anna Lingeris. She's THE PR person at Hersheys {@ahhnalin on Twitter. you're welcome.} and I gotta tell you, I like the way she spoke. She shot straight from the hip and that's how I prefer it to be. I often am guilty of doing the same when I'm talking to people.

Anywho, she wanted us bloggers to know a few things from a PR individual's perspective. She began by telling us, the bloggers, we are incredibly valuable. Ah, I'm justified. See. Bloggers, review bloggers, know how valuable we are. We see our reviews making a difference in how and where people shop and what they buy. Yes. We are valuable...and PR people know this.

She also pointed out the room for improvement in how bloggers and PR people work together. The amount of bloggers in the "blogosphere" grows daily and rapidly. This causes communication challenges between us and PR as well as confusion, lack of knowledge, and no consistency in how these blogger to brand relationships go.

On a day to day basis, PR workers are faced with concerns of budget, planning, brands, value, quality, reach, resources, legalities, approvals, and more approvals just to get one review item to one blogger. Phew! They have a lot of plates to spin, right? I think it's easy to forget when we're waiting for a reply to an email just how many hoops must be jumped before they can come back and say "Yes". And to this point, we need to remember that it's a two-way street. Both bloggers and PR need to have trust. {So be trustworthy, mmkay?}

Now, here's where Anna's session got really helpful. She gave us a list of things that make up a successful pitch to PR. Write this down, print this out, tweet it, share it, and put it on your fridge. This is what we should be including in our pitch every.single.time. Ready?

  • Who are you? {It may go without saying but some people choose just to email a "hello" and then ask for the moon to review. PR wants to hear about you and your blog. Briefly.}
  • Why are you interested in working together? {Don't just ask for the moon. Let them know what it is about the moon that you think fits you and your blog.}
  • What sparked your interest? {a.k.a. What brings you here?}
  • What is unique and different about you? {Take this opportunity to let your personality shine}
  • Short and concise {Anna suggests keeping your pitch to 150 characters. Absolutely keep it above the fold. If she has to scroll to read your pitch, she's going to skip it.}
  • Follow up. Follow up. FOLLOW UP. {PR peeps are busy and sometimes they really do mean to get back to you but get sidetracked. Following up, done gracefully, shows initiative and reminds them that they want to work with you.}
Here's a list of things to remember about the Blogger/PR relationship:

  • Remember...
    • The same thing you ask of PR, they ask of you. It's a 2-way street, baby!
    • Know WHO you're contacting. It's so nice to see an email sent to you personally, isn't it? Find out who you're emailing and pitch to them by name.
    • Give them a reason to believe you're who they want to work with.
    • Attempt to understand their business. The PR world can be complicated but trying to understand them creates a level where you can relate to them and they, you. It's a beautiful thing.
    • Cultivate a relationship. {This is good for both you and them and they may think of you for future campaigns.}
    • If you choose to share a press release, share some of your own thoughts on it too. PR wants to know what you think. They don't just want to see their words put on your blog.
    • IF YOU WANT TO BE PAID FOR YOUR REVIEW, PRESENT THE FEE YOU DESIRE IN YOUR PITCH. Have a marketing plan ready to show them how you plan on earning those dollar bills too. 
So, you want to be a review blogger? I hope these very helpful tips have given you a platform to start from. If you're already an established "reviewer", I hope you've found something in this post that you can use to tweak the way you're currently doing things. 

For me, I'm a "self-made" review blogger. I didn't ask anyone for any help when I was getting started. I just decided to put myself out there and get going on reviews while observing some well known blogs for the "how to's". I loved this session and have taken away a good chunk of know-how while building my confidence to continue to work with brands and reach out to new ones. 


Photobucket

Review Blogging: Pitching PR, According To PR

Read More

Tuesday, January 4, 2011

Just before Christmas, I was reading the blog Katydid and Kid. She posted directions for how to make homemade Peppermint Bark. {Click the link to see her post.} I was SO excited to find this as I was trying to think up something to make for my family's Christmas party that was quickly approaching and I hadn't a clue what to make. I commented there that I would be making this for my family {and thanks for the idea}. I want to share it here with you too, though. After all, peppermint bark is not specific to any holiday. It's just a yummy treat we should all enjoy {says me}.

Now, get your things together. Here's what you'll need: {These ingredients are taken directly from Katydid and Kid's post with my own notes included and highlighted.}

  • 24 oz. milk chocolate chips 
  • 36 oz. white chocolate chips
    • {basically, 2 bags of each if you're grabbing bags at the grocery store like I was}
  • Peppermint oil or extract
    • {I used peppermint extract. It turned out great!}
  • 2 boxes of candy canes
    • {I had a bunch of small candy canes at home and grabbed one box of large candy canes while at the store. Just be sure you have A LOT of peppermint pieces if you combine like I did.}
  • aluminum foil
  • cooking spray
  • large baking pan (mine was 12"x18")
  • Double boiler (or a 2 bowls that can fit over a pot of simmering water)


Alrighty! Once I had everything together, I lined the baking pan with aluminum foil and sprayed it with cooking spray.

Next, I got my pot of water on the stove top and began heating it to a low boil.


And while I was waiting for the water to boil, I beat up the candy canes into little pieces. Katydid and Kid suggests that this is good for the kiddos to help with and I'm sure she's right. I just really wanted to get some tension out so I did it myself. *sigh* That felt good. LOL


Nice. The water began boiling so I threw the milk chocolate chips into my double boiler and stirred it up until it was creamy and...


melted. YUM!


I then poured the milk chocolate onto the baking sheet, smoothed it with the back of a spoon, and let it set. *Here's a tip. I threw the milk chocolate into the freezer while I melted the white chocolate so I was sure that it was ready for me when I was ready for it. The melting process goes pretty quickly so it's not in the freezer long enough to have to worry about it.*


 Half way there! I washed out my double boiler, dried it, and threw it back on the pot of boiling water to melt the white chocolate. Once it was good and creamy, I added the peppermint extract {I added about 3/4 a cap} and stirred in just half of the peppermint bits.


I grabbed my milk chocolate {that was taken out of the freezer before I mixed in the peppermint extract and candy cane pieces} and spread the white chocolate on top of it. Finally, I sprinkled the second half of the peppermint bits on top of the white chocolate for a yummy finish.


Mmmmmmmmmmmmm.

I popped this back into the freezer so it could set. After that, I put it on my kitchen counter, brought it to room temperature and got ready to cut it. {This is the easy, peasy part.} All I had to do was peel the sheet of peppermint bark off the foil, score it with a chef's knife, and break it into pieces. I also had cute baggies to fill with the pieces that I found at Walmart to make it look like a gift {20 for $1!!}.

Honestly, I can tell you that this went over HUGE with my family and it is now my "thing" that I'll make every year to hand out at the Christmas party. The only thing I'm changing? I'm making a double batch next year so I can have more for us at home. It's truly delicious!

{ponder} Perhaps I can make some for us this week "just because". Hmmm....


Photobucket

Peppermint Bark ~ A Delicious, Winter Snack {tutorial}

Read More

Copyright © Amy Clary | Designed With By Blogger Templates
Scroll To Top