User-agent: Mediapartners-Google Disallow: User-agent: * Disallow: /search Allow: / Sitemap: https://www.amy-clary.com/sitemap.xml
Showing posts with label home decor. Show all posts

Thursday, March 9, 2017

**affiliate links may be used in the body of this post**

I sit here today, on the brink of wrapping up a license to take in a foster child. We're so close. We're so very, very close.

But I can't possibly sit here and tell you the story as if the hubster and I have done every bit of the preparation thus far on our own. No. See, foster care isn't something any one person or household can do succesfully alone. It's something that calls for "All hands on deck"; every person gathering around the life of this one as if they're of utmost importance.

It's almost laughable the difference between preparing for a biological child and a foster child. In my experience (and I've done this 3 times now), when you're expecting a biological child it looks like a little like this

  • People buy you gifts for the baby
  • You get asked if you're having a boy or a girl or what your preference is if you don't know
  • You get judged on the name you've chosen (oh, yes you do)
  • Everyone has strong, almost religious opinions on what you need and don't need
  • Your physical space is no longer yours. From the OBGYN to the woman at the grocery store, everyone must touch you.
  • There are classes that teach you how to nurse and how to birth but after that, people hand you books like "What to expect..."  (and believe me, the abounding opinions on what you do right and wrong makes you wish there were some sort of standard training you had to take)
  • While adjusting to growing, birthing, and mothering a baby you try so hard to remember back to when you were sane and not randomly yelling, crying, eating, or all of the aforementioned at the same time
In short, there is A LOT of activity happening, personally and in the world around you, all because you're having a biological child. But I easily felt lost, confused, and in denial that the hospital just let me leave with the baby I had because I had no idea what I was doing. "Don't worry, honey. You'll learn." I was encouraged from time to time.

Foster care looks like this:
  • The closest family and friends gather to supply gift cards for the things you need to even create a space in your home for a foster child. This was a most beautiful day and my children learned again what it looks like to put others before yourself. 
  • You still get asked questions about gender/age/race preferences. I wish I had a hidden camera on my glasses to capture the face of some who hear the answer "we're open to any race or gender...ages 0-4". Oh, you'd be surprised... lol
  • You're told all the reasons why the person you're presently speaking to "Could NEVER" do foster care & wonder how you're supposed to respond. I tend to say, "That's OK. You can help us!" (I am not so naive to think I won't need help at all)
  • Some people have horror stories of foster care that they can't wait to tell you. All sorts of extreme stories that, I guess, aren't meant to scare me out of being a foster parent but serve as a "just so you know" kind of warning. (Yes, someone told me a story of how a foster child grew up to kill his adoptive parents. Lovely. And the chances of that are...?)
  • People come to your home and ask you the most invasive questions about you, your parents, your siblings, your childhood, your work experience, your religion, your thoughts on foster children, your discipline techniques, and on and on and on. Then those answers are sent to the state for everyone there to know ALLLLLL about you, too.
  • There is training upon training upon training to make sure you're very well supported with resources, tools, and contacts to help you through your journey in foster care. 
  • Stress is the new hormonal storm. The stress of preparation, answering hard questions my own children have, trying not to play the "what if" game, waiting - waiting - waiting, & getting the home good enough for the state's approval is heavy. Not to mention the paperwork. It's a lot.
Yes, my family and I, we are embarking on new territory. We're going down a brand new path and one so familiar yet foreign and intimidating at the same time. 

I mentioned in the first bullet point of foster care preparation about the people who gathered to give us gift cards and well wishes. My mom put the whole thing together. We ate lunch, we played a game, and we talked about why we're pursuing foster care. The fellowship and support there was beautiful. 

Upon arriving home, the hubster and I opened cards from people - some sent in the mail over time and others given to us at the shower. We cried. I actually had to leave the room for a minute and cry because we were so overwhelmed by generosity.  

I want to show you all the room that we've been able to put together because of the people help and support of the people around us. 

mom lifestyle blog

This first one is an earlier pic I took before the bins were full but it's the only one I have to show you the rug we were able to buy. I found both the rug and the woven hamper at At Home stores. (These 2 items together were less than $50! ) The shelves and bins we've owned since my oldest was a baby. We found them at Ikea.  

Above the hamper, is a DIY project I did. I needed to create a comforting yet gender friendly space. I went with a "cozy cottage" theme and made the deer silhouette art and refinished the frame. I'll have to share that project in greater detail sometime. 

mom lifestyle blog

Here we go. The bins are all full and my kiddos try to give more and more toys to our foster child. I ask them to put them aside in the basement for now so we don't clutter up the room. :) 

mom lifestyle blog

Moving to the left, I bought the chevron pieces on the wall from a shop called Gypsi Dreamz Boutique. This was actually the very first (and second) thing I bought for the room. The fleece blanket was made with love by my sister-in-law, and the rocking chair was bought at a thrift store. It does have cushions. I was just having them freshened up with new fabric when I took the pictures. 

mom lifestyle blog

The "hope" above the window was made from the Letterpress Blocks sold on the Dayspring website. The changing table was returned to us from someone we lent it too and we were able to go buy a brand new changing table pad for it. And the moose on the wall was actually from the At Home stores as well. It was in the Christmas clearance...it's an ornament. I unstapled the bells from it and it became a wall decoration. :) I'm pretty sure it cost me less than one dollar. 

mom lifestyle blog

Finally, the crib. This is a Target purchase and we were able to buy it on a day when all their nursery items were an extra 20% off. This crib changes into a toddler bed, a day bed, and a full size bed. It will be perfect for our 0-4 range that we're aiming for. 

The wood signs above the crib were another DIY project for me. I've found a new love that is taking apart wood pallets and playing with power tools. These were fun to make and tie the "cozy cottage" theme together. 

mom lifestyle blog


 Everything I said I bought was only possible through the use of the gift cards our family and friends blessed us with. And I didn't picture the baby proofing items I bought, the baby gate, or the convertible car seat that is in the closet. This room isn't just my doing. I love that I can share that with the child who joins our family. We're also blessed to have some gift cards left to help us cover those last minute needs that will pop up when we have a placement - needs like bottles, pacifiers, diapers, etc.

Friends! We're so close now. Soon I'll be able to show you a shadow of our foster child or the little hands and feet we're caring for. As the child will be a ward of the state, I'm not allowed to show you his/her face. But I'll be sure to give you sneak peeks into our home as I'm able.

Please continue to pray for us and also for the child who will join us. We're excited but sober-minded as we head into this journey. A child being placed with us will mean that there is a world of hurt behind his/her eyes. But. Love never fails. Love is the plan here in this home.

Now if I could only run around my home and give every room a makeover...

~Amy


SaveSave

That Time When The Village Shows Up ~ Another Step In Our Foster Care Journey

Read More

Saturday, October 20, 2012

We just bought a new home and I am so looking forward to decorating it for Christmas. Of course, I'm the the type who likes to decorate the day after Thanksgiving and keep everything up until New Year's Day so I need winter themed items as well.

I was recently sent to Personal Creations with a gift card to use toward whatever I saw fit. Immediately, I saw this sled and knew that I HAD to buy it for the front porch. This is the Welcome Snowman Sled Wall Hanging and it sells for $39.99.


 My home is OLD so it has 2 doors on the front porch. One door leads to the front parlor {and is never used, waiting to be caulked shut} and the other door is just beside that clay pot you see in the first picture. Anyway, I thought it would be cute to place the sled on that unused door to dress up the space a bit.

I love the look of the sled. It's made of wood and is painted but the personalized text is done in vinyl letters. There is also wire hanging from the top of the sled in case I'd prefer to hang it on the wall. Seeing my family name on it, though, got me all excited. It makes the space officially ours. :)

I had some money left over so I bought my son a Webkinz Turkey. The ribbon on the turkey's neck is personalized to say "Gobble, Gobble" on one side and "Alex 2012" on the other. I didn't get personal images of the turkey but here's the stock image for reference.  This sells for $7.99 on the website.


He promptly named his turkey "Z-Turkey" and plays on my computer with him when he's earned time to do so. He really loves it...and I may have opened a can of worms with this purchase. LOL

My total for both items and shipping was under $65 and I'm confident that both items will last for quite some time in our home. I think I spent my money wisely! How about you? Are there other things on the Personal Creations website you'd prefer over what I chose?

**Thanks to the PR firm who supplied the gift code to purchase the reviewed items in exchange for an honest review. In this post I share my opinion and experience. Others may not have the same experience or may have a different opinion.

Photobucket

Personal Creations And My Shopping Experience {review}

Read More

Wednesday, September 26, 2012

There's a chill in the air and the seasons are changing. For some of us, that means rain, or snow, or freezing temperatures. The cold seasons drive us indoors in search of fun but I prefer setting up stations in an effort to have a place for everything.

What I'm about to show you is not an original idea, but one I copied from a friend, who may or may not have found it on a website somewhere. {I have no links to reference for you, is what I mean to say.} HOWEVER, it's a great idea and has such a tiny price-tag, I just had to share it with you.


Eliana had inherited some Disney Princess gowns that my mom made for my nieces and Alex had his own bit of wardrobe for make-believe time and I needed it all in one place and easy to maintain. I went to IKEA and bought the Bygel rail {39 1/4" long} for $3.99 and a 10 pack of S-hooks for $ .99. I already owned the toy box {APA Storage Box - $14.99} so I set that under our garment rack to hold extras/accessories. 

Really, though, the hanging wardrobe for only a $5.00 investment is well worth it. It's also very easy for the kiddos to get to and use. We set it at a height they can reach and screwed it into the walls {using wall anchors}. It was just that easy.

When we move into our new home, I'll be setting this up in the room we've designated as the playroom. I'll have to remember to update this post with pics from that space.

For now, the wardrobe is centered under our Historical doll collection from American Girl and some vintage baby clothes I have. {Caroline is actually in the place of Josephina since her arrival...just in case you're wondering.}


Photobucket

DIY Dress-UP Center {Inexpensive and Easy}

Read More

Tuesday, December 20, 2011


I love the look of a French Memo Board but there's no way I wanted to pay the hefty price tag of one that I wasn't even sure the person I was shopping for would like. I decided to try my hands at a DIY project so I could customize it and I had a lot of fun putting this together.

First, let's talk about what you need!

I headed over to Walmart to grab some things from the Elmer's Memory Keeping and X-ACTO Lines.


Pssst....click that button right there to enter for a chance to win the wall of product! It's OK. I'll wait and start the tutorial when you get back. ;)


Now to get to work! First, I drew a line down my piece of foam board so I could cut it exactly in half with my X-ACTO knife. To get the finished look I was going for, I knew I would need 2 pieces. 

Next, I grabbed some scrap batting that I had left over from another project I did a while back.


I cut this to be a tad bit smaller than the foam board. In projects done with wood, you would cut this larger than the board so you could pull it around the sides and staple gun it into place. Foam board doesn't care much for staple guns so I took a different approach.


For this project, grab the foam mounting tape and put 2 pieces on each corner {as pictured above} and put one, additional piece on the sides in between the corners. 

Pull the backing off the tape...


and starting at one corner, gently tug the batting into place on the tape... 


until you've covered the board.
{Remember, you don't have to do this part, I just wanted the front of the board to be a little more plush than flat. }


Now, it's time to grab your fat quarter of fabric {just one for now}.


Lay it on the foam board, covering the batting and making sure the board is centered beneath it. Gently sandwich the board and the fabric between your two hands and flip it over so you can work on the back of the foam board.


Grab that glue stick! 


Now it's time to glue the fabric to the back of the board. I did it in this order:
  • left side
  • right side
  • top
  • bottom


 You can do it in whichever order you see as the best way but I'll go ahead and explain why I chose the order I did. By gluing down one side, I found it easier to pull the opposite side taut so the front of the board had a neat and tight finish. This is pretty important when getting those ribbons into place.


 Now, roll out the ribbon from one corner of the board to the other, leaving about 2 inches on either end to be folded around the back.


Making sure there are no twists in the ribbon, secure it on one corner with a staple {mine didn't go through the board}


Then, on the opposite corner, pull the ribbon tight and staple it down on the back.

That first ribbon will become your guide for the others you put into place. I "eye-balled" where the ribbons should go on the front of the board before securing them down. Just be sure to make stripes one way only, until you're happy with the look of it.


Then, beginning at the opposite corner from the one you started on, go over the ribbons that are already down and staple it into place as you have been.


You'll be doing the same thing you were doing before, just from the other angle so you can create the diamond shapes that will become the memo or photo holders.


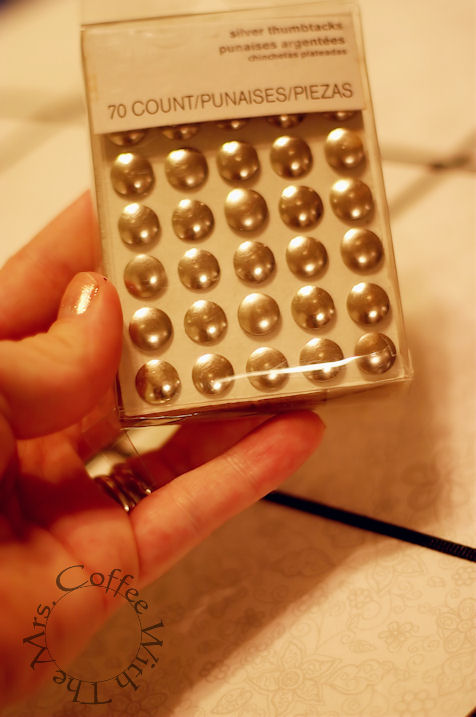
 Once the foam board is full of diamonds,  {and to your liking} grab the thumbtacks.


Simply push one down at every ribbon's intersection. These will go through the foam board, but don't worry. You'll be creating a finished look for the back that will hide all the staples and pointy tacks. 

To do this, grab your second piece of foam board {remember the other half you have left over?} and the second fat quarter of fabric. Now, simply cover the board with the fabric the same way you did at the beginning of this project. Make sure it's nice and taut and glued into place. 

After that's done, grab the foam mounting tape again and put some at each corner of the foam board's raw side and one additional piece between each corner on the board's length and width. {You can do 2 additional pieces if it makes you feel better. 


Now, you need to make the board's hanger. I {again} eye-balled how long the ribbon should be to hang it on the wall. I ended up going with about 2 feet, give or take an inch or two, and stapled it down on the top corners BEFORE putting the finished back piece on. {You determine which side is the top, obviously.}


Now, go ahead and put the finished backing into place and make sure to push down hard where the mounting tape is so it secures well.


Wa-La! We have a French Memo Board!! Cute, right?

Want to make a quick, little gift tag for it?


Alright! Grab those X-ACTO templates and decide on an edge pattern that you would like. My templates offered me 4 different options in edges and I chose one that looked like a postage stamp.


I used the paper cutter I own to cut a piece of scrapbook paper down to a 4"x6" size. Then, I cut the construction paper I chose down to a 3"x5" size. 


After getting my template in place to cut my edge evenly, 


...I grabbed my X-ACTO craft knife with a swivel blade to cut out the edge's design. It was SO much easier than I thought it would be. {This was my first time using this tool.}


Then, I grabbed the template for the gift tag. There are many different sizes to choose from. {I love this!!} I chose the second largest size and cut it out with my X-ACTO craft knife.


For a nice, finishing touch to the gift tag, I used a heart shape on one of the templates and centered it over a butterfly to cut it out. 


Now, cut a small piece of ribbon that's also big enough to tie a bow with. 


And tie that bow through the top of the tag shape you just cut out.


Yep! Its time to grab that foam mounting tape again! I placed 3 pieces on the back of the tag so it wouldn't sag in the middle after attaching it to the scrapbook paper. 


Then, cut a small piece to put on the back of the heart you cut out.


This is how I positioned my tag on the scrapbook paper as well as the heart on the tag. I really like the 3D look the mounting tape gives these things.


Personalize your tag...


and stick it on the board. I think it's a cute way to gift this item. Don't you?


Here's the finished look!


I had some of the items I used at home already but had to buy a lot of the tools I used. You can see my shopping trip by heading over to my Google+ album. In total, I spent $39 but I'm sure this is a gift that its receiver will like. {If you have most of these tools already, it will cost you even less!} That's the fun of DIY, really. You can make whatever you want to suit whomever you want. :)

 DON'T forget to enter to win the wall! :)

**This project has been compensated as part of a social shopper insights study for #ElmersHoliday #gluenglitter #Looks4Less #collectivebias #CBias. All opinions and views are 100% my own. Others may have a different experience or opinion. 

Follow Me on Pinterest

Photobucket

DIY French Memory Board #ElmersHoliday #GlueNGlitter #LooksForLess #Cbias

Read More

Copyright © Amy Clary | Designed With By Blogger Templates
Scroll To Top